
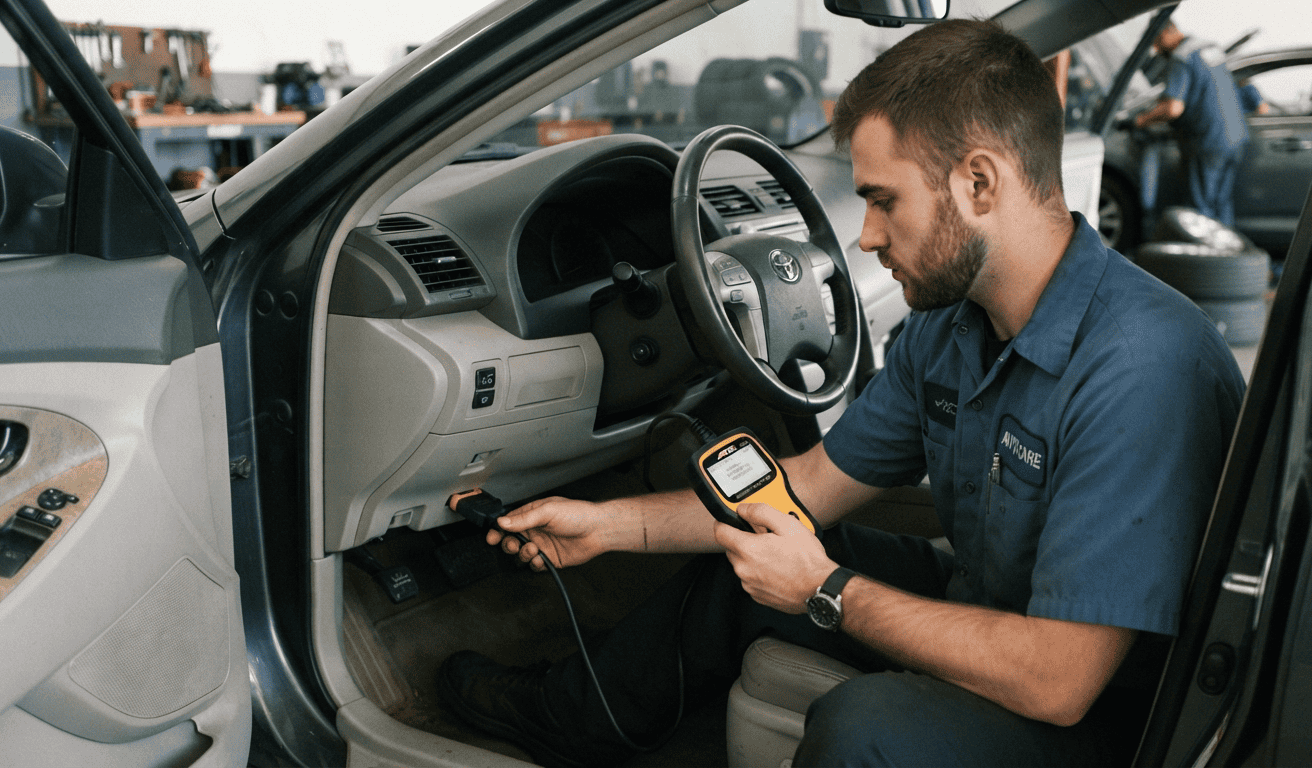
To use an OBD2 scanner, plug it into the 16-pin OBD2 port under the driver’s-side dash, turn the key to the “on” position without starting the engine, and let the scanner connect. Then select “Read Codes” to pull the stored diagnostic trouble codes, note the freeze-frame data attached to each one, and look up what every code means before you touch a single part. A code tells you which system reported a fault. It does not tell you which part is broken, and that difference is the whole game.
If you have never plugged one in, that is the entire process in one breath. The rest of this guide slows it down so you know what each step is doing, how to read the codes without guessing, and the mistakes that turn a cheap fix into an expensive one.
What an OBD2 scanner actually tells you (and what it can’t)
Every car and light truck sold in the US since 1996 (and in the EU since roughly 2001 for gasoline) has a standardized OBD2 system. The scanner talks to your car’s computer and asks a simple question: are any systems reporting a fault, and what were the conditions when it happened?
What it gives you back is a diagnostic trouble code (DTC) and, on most tools, freeze-frame data. What it does not give you is a diagnosis. This is the single most important thing to understand before you spend any money on parts. A code points at a system, not at a definite broken component. “Cylinder 1 misfire” is a symptom. The cause could be a spark plug, an ignition coil, a fuel injector, a vacuum leak, or low compression. The scanner narrows the search. It does not end it.
Step 1: Find the OBD2 port
The port is a trapezoid-shaped 16-pin connector, and by federal design it lives within about three feet of the steering wheel. In the large majority of cars it is under the dash on the driver’s side, just above the pedals, sometimes behind a small flap or cover.
If it is not obvious there, check these spots in order:
- Below and left of the steering column
- Behind an ashtray or a removable panel on the center console
- Near the fuse box, or behind a cover under the dash
- Around the bottom of the center stack (common on some German cars)
Your owner’s manual lists the exact location, and our port location guide works through the hiding places make by make. If you are shopping for a make with a hidden port and manufacturer-specific quirks, a scanner built for that brand saves a lot of grief. That is a separate topic we cover in choosing a scanner that reads BMW-specific codes. If you are not yet sure your car is in scope at all, start with what OBD2 compliant means for your model year, and if it predates the standard, OBD1 and pre-1996 cars.
Step 2: Plug in and read the codes
Turn the ignition to the “on” or “run” position (the dashboard lights come on, but the engine stays off). This wakes up the computer without the engine running, which is all the scanner needs to establish a connection. Some scanners ask for your VIN before they will pull codes; enter it if prompted.
Then select “Read Codes” or “Scan.” You will usually see codes sorted into three buckets, and the difference matters:
- Stored (confirmed) codes are faults the computer has seen enough times to be sure of. These are what usually turn on the check engine light.
- Pending codes are faults detected once but not yet confirmed. The computer is watching to see if it happens again. A pending code can clear itself if the fault does not return.
- Permanent codes are confirmed faults that a scanner cannot erase. Only the car itself can clear them, after it re-runs its self-tests and sees that the problem is actually gone.
That last category is deliberate. Permanent codes exist so a driver cannot just erase a fault to sneak through an inspection. The car has to verify the repair on its own, and the mechanism is explained in full in why your scanner refuses to erase permanent codes.
A basic reader may also come back with nothing at all while a warning light is on. That is usually not a fault with the tool: generic OBD2 covers emissions-related powertrain data only, so ABS, SRS and transmission modules are outside its reach, and how far any given tool sees into your make is the subject of scanner brand coverage. On some recent vehicles a scanner can connect and still return nothing because of the protocol your scanner has to speak.
Step 3: How to read a code (the letter and four digits, decoded)
Every DTC is one letter followed by four characters, like P0301. Reading it left to right:
- First letter, the system.
P= Powertrain (engine, transmission, fuel).B= Body (airbags, lighting, climate, power seats).C= Chassis (ABS, steering, suspension, wheel-speed sensors).U= Network (module-to-module communication faults on the CAN bus). - First digit, generic vs. brand.
0means a generic SAE code that means the same thing on every make.1(and often 2 or 3) means a manufacturer-specific code, defined by your carmaker for its own features. - Last three digits point to the specific subsystem and fault, such as a cylinder number, a circuit, or a sensor reading out of range.
So P0301 breaks down as: Powertrain, generic, cylinder 1 misfire. A P0301 means the same thing on a Honda as it does on a Ford. A P1xxx code, by contrast, means you need a lookup source specific to your brand, because the number is theirs, not the industry’s.
Freeze-frame data is the part beginners skip
When a code sets, the computer photographs the conditions at that exact moment and stores them with the code. That snapshot is called freeze-frame data, and every OBD2-compliant car is required to keep it. It typically includes engine RPM, engine load, coolant temperature, vehicle speed, and fuel trim values at the instant of the fault.
This is gold, and most guides breeze right past it. Freeze frame tells you whether that misfire happened cold or warm, at idle or at 70 mph, under heavy load or coasting. A misfire that only appears cold at startup points somewhere very different from one that only appears under hard acceleration. Read the freeze frame before you decide anything, and read it properly: we give it a page of its own in the snapshot your scanner already saved.
A real worked example: tracing P0301 like a shop would
Say you read the codes and get a single P0301, cylinder 1 misfire. Here is the order a working diagnostic follows, which is different from “buy the first part the internet suggests.”
- Read the freeze frame first. If it shows the misfire set at a cold idle right after startup, that is a clue pointing toward a weak spark component or moisture, not a fueling problem that would show under load.
- Do the free visual checks. Pull the coil and plug on cylinder 1. Look for a cracked plug, oil in the plug well, a chewed connector, or an obvious vacuum leak nearby. This costs nothing and catches a large share of misfires.
- Swap and re-test. Move the cylinder 1 ignition coil to cylinder 2, clear the code, and drive. If the misfire follows the coil to cylinder 2 (now a P0302), the coil is bad. If it stays on cylinder 1, the coil is fine and the fault is the plug, the injector, or compression.
- Only then buy a part. By this point you are replacing a known-bad component, not gambling.
Notice the cheap-fix-versus-expensive-fix fork. A worn spark plug is one of the most common and least expensive causes. Low compression from a burned valve is one of the most expensive. The same P0301 can mean either, and the only way to know which is to work the steps rather than the code. This is also why a light that stays on deserves attention even when the car seems to run fine: a mild misfire you cannot feel can still be dumping raw fuel into the catalytic converter.
When NOT to clear codes (and why clearing is not a fix)
Here is the honest part that vendors selling you a scanner tend to leave out: clearing a code does not fix anything. It erases the message, not the fault. If the underlying problem is still there, the code comes back, usually within a few drive cycles. Worse, clearing a code can hide a real problem you needed to see.
Do not clear codes when:
- You have not fixed the cause yet. Clearing first erases the freeze-frame evidence you need to diagnose it.
- An emissions or safety inspection is coming up. Clearing codes resets your car’s readiness monitors to “not ready.” The car then needs multiple specific drive cycles to re-run its self-tests. Show up before those complete and you can fail the inspection even though the car runs perfectly, simply because the monitors are not set.
- You are buying a used car. A cleared-code car with “not ready” monitors is a classic way to mask a fault long enough to close a sale. If the readiness monitors are freshly reset, treat it as a red flag.
The right sequence is always: read, diagnose, repair, then clear to confirm the fix holds. Clearing is the last step, not the first. The judgement call gets its own page in should you clear OBD2 codes, the inspection consequence is covered in readiness monitors and drive cycles, and the ten-minute check that saves a wasted trip to the test station is in pre-checking your own emissions test.
Live data: the difference between a code reader and a scan tool
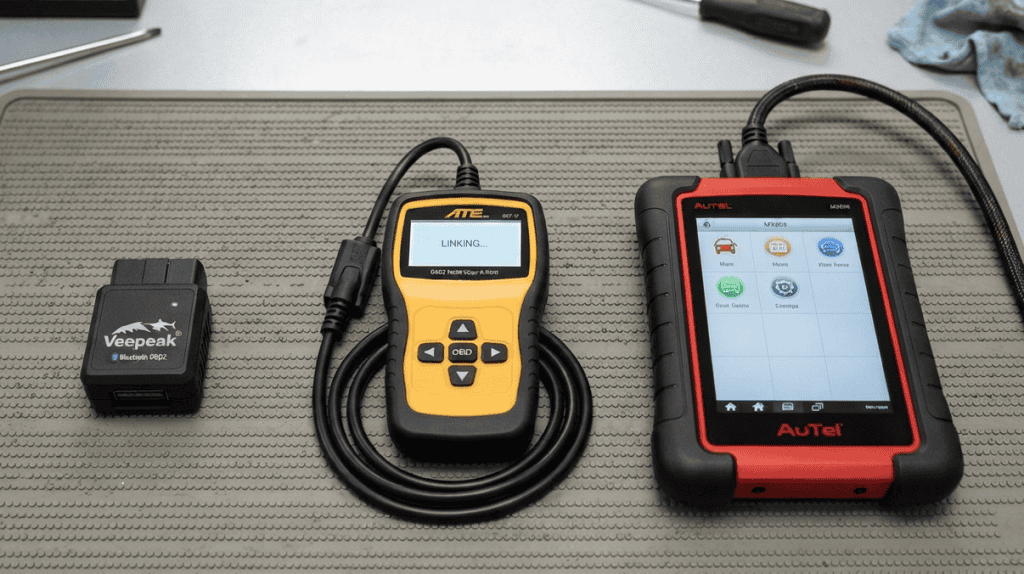
This is where cheap and capable tools split. A basic code reader does one thing: it shows stored codes and clears them. That is genuinely useful, and for a lot of drivers it is enough.
A better scan tool adds live data, a real-time stream of the sensor values (called PIDs) that the code reader never shows you. Instead of a single frozen snapshot, you watch coolant temperature climb, fuel trims correct, O2 sensor voltage swing, and RPM respond while the engine runs. Live data is how you catch faults that never set a code at all, or confirm a diagnosis before spending money. Watching short-term fuel trim jump the instant you create a vacuum leak is worth more than any single code.
Which values are worth watching, out of the fifty a tool will happily show you, is the subject of the ten PIDs worth watching.
The most capable tools go one step further with bi-directional control, actually commanding components (cycling an ABS pump, firing an injector, activating a cooling fan) to test them on demand. If you want to understand where that line sits and whether you need to cross it, see our guide to what a bi-directional scan tool does, and for the tier above that, when the jump to a professional scan tool is worth it.
So the honest hierarchy is: a cheap reader shows codes, a mid-range tool shows live data and freeze frame, and a premium tool commands the car. Buy for the diagnostics you will actually do, not the biggest number on the box.
Choosing a tool, in the order the decisions come
If you are still deciding what to buy rather than how to use what you have, this cluster answers it in pieces:
- Best OBD2 scanners for beginners, which is where to start.
- Bluetooth dongle or handheld scanner, the format decision, and Wi-Fi, Bluetooth or USB for how it connects.
- OBD2 apps compared if the phone route appeals.
- Scanner subscriptions and firmware and coverage updates, which decide what the tool costs after you buy it.
- Can an OBD2 scanner drain your battery before you leave anything plugged in permanently.
- OBD2 scanners on hybrids and EVs and battery registration for electrified and recent European cars.
- Using a scanner in the cold if you work outdoors in winter.
Cold-weather codes: faults that only show up below freezing
Temperature changes which codes appear, and this trips up a lot of drivers. A few faults are far more likely, or only appear, in the cold:
- P0128 (coolant thermostat below regulating temperature) shows up more in winter, when a stuck-open thermostat can never let the engine reach temperature.
- Misfire codes (like our P0301) appear more at cold startup, when weak ignition coils, moisture, or a marginal spark plug struggle most.
- Low-voltage and network (U) codes can trigger when a weak battery sags in the cold and modules briefly lose communication.
If a code only ever sets on freezing mornings and clears by afternoon, the freeze-frame temperature reading is the first thing to check. It confirms the fault is cold-related and steers you away from chasing a problem that only exists at 10 degrees.
Where the tool stops
One last thing, and it is the honest close to all of the above. A scanner tells you what the car noticed and where. It does not tell you what is broken, and treating a code as a verdict is the most expensive mistake in home car ownership. We give that argument its own page in what an OBD2 scanner cannot tell you, and it is worth reading before you buy a part rather than after.
AutoGearZone does not sell scanners or earn a commission on any tool named here; the goal on this site is to explain the diagnostics plainly so you buy once and use it well. You can read more about that approach on our about page.
FAQ
Can an OBD2 scanner drain my battery?
A plugged-in scanner draws a tiny amount of power, so leaving a Bluetooth adapter in the port for weeks can contribute to drain on a car that already sits unused. For normal use, unplug it when you are done and it will not affect a healthy battery.
Does an OBD2 scanner work on hybrids and EVs?
Standard OBD2 works on the emissions and generic powertrain systems of hybrids and most EVs, so you can still read generic codes. But the high-voltage battery, motor, and charging systems often use manufacturer-specific codes that a basic reader will not fully interpret. For deep hybrid or EV diagnostics, you usually need a brand-specific tool.
Is it safe to drive with the check engine light on?
It depends on how the light behaves. A steady light usually means a stored fault you should diagnose soon but can often drive with briefly. A flashing check engine light means an active misfire that can quickly destroy your catalytic converter, so reduce power and get it checked right away.
What is the difference between a Bluetooth adapter and a handheld scanner?
A Bluetooth adapter plugs into the port and streams data to an app on your phone, which is compact and cheap but depends on the app’s quality. A handheld scanner has its own screen and is self-contained, which is more reliable in the shop and does not tie up your phone. Both can read codes; the better ones of either type add live data.
Do I have to look up the code, or does the scanner tell me the problem?
The scanner shows the code and, on better models, a short description. It does not diagnose the actual failed part. Always look up the code’s full meaning and common causes, then work the freeze-frame and visual checks before buying anything.
1 thought on “How to Use an OBD2 Scanner: A Beginner’s Step Guide”